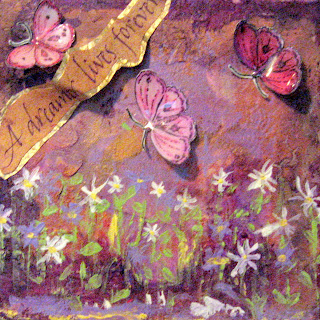
Why would you make a decayed looking background? I wondered the same thing. But then I thought it looked like a really cool way to use a lot of the Ranger products I have hanging around my craft room This technique comes from Jill Geraghty-Groves articles in Somerset Studios March/April 2011 issue called Layer After Layer and is very addictive. I want to keep doing canvas after canvas, each canvas looks totally different and was so much fun to create and watch develop. I love doing backgrounds, it's what to do with them after the background is done that I find the most difficult. I use butterflies a lot in everything I do. I like the delicate look, the colors and the way they soften what could otherwise be a rather harsh looking piece.. So here are the steps to creating your own decayed background ( I used a lot of the directions from the article).
Tools & Materials
- Acrylic paint
- Adhesives - Diamond Glaze or Glossy Accents, glue stick, and Tacky Glue. (Whatever is appropriate for the materials you are using.)
- Alcohol inks
- Crackle paint (Ranger)
- Embellishments
- Die Cuts
- Photograph & other ephemera
- Fibers
- Scissors
- Spray bottle filled with water
- Gesso
- Glossy or Matte Medium
- Sponge applicators
1. Prime canvas with a layer of gesso; this gives more grip for future layers, and will enhance your choice of mediums for subsequent layer. Let dry completely.
2. Tear a selection of vintage papers, manuscripts, letters, old dictionaries or whatever you want to make a collage. I keep on hand stamped, colored and cut out images to use in projects and I have an old dictionary that I can rip up.. Attach them to your canvas with matte or glossy medium applied with a sponge applicator.. Allow to dry completely.
3. Using Golden's Titan Buff mixed with gel medium, paint over the entire surface of the canvas If there is an area in particular that you want to highlight, use a baby wipe to gently remove some of the paint. Allow to dry completely.
4. Using a selection of Ranger Distress Crackle Paints ( I used Picket Fence, Antique Linen and Broken China), roughly apply a few layers of paint to the edges. I started with the lightest and let each layer dry before applying another layer. You can use a heat gun to speed up the drying process. ( The paint crackles better if you allow it to air dry for a while and when it starts to crackle finish drying it with a heat gun.)
5. Have s spray bottle filled with water ready. Working very quickly, apply a few drops of selected alcohol ink colors ( I used Lemonade, Lettuce and Hazelnut) to the corners of your canvas. Before they get a chance to dry, quickly spray over the colors with water. You'll see that the alcohol inks start to drip beautifully down your canvas and seep into the cracks of the crackle paint, bringing out even the tiniest crackle. Keep adding ink and water until you are happy with the result. Allow your piece to dry completely before decorating.
6. While I was waiting for my piece to dry I distressed a small tag with peeled paint and tea dye Distress Inks. I stamped a flourish from Impression Obsession and finished with a saying from Tim Holz Stuff to Say cling stamp set. I cut a piece of foam core to fit the back of my tag and attached it with Glossy Accents ( this is to give the tag support and also to make it dimensional ). I attached the fibers and then used the Glossy Accents to attach the tag to the canvas. I attached a clock from the Tim Holtz's idea-ology also with Glossy Accents.
Have fun working with a variety of colors and materials, you will be amazed at the different effects you can create.


2 comments:
These are gorgeous! Can't wait to try this technique!
Thank you. If you do it post pictures OK.
Post a Comment