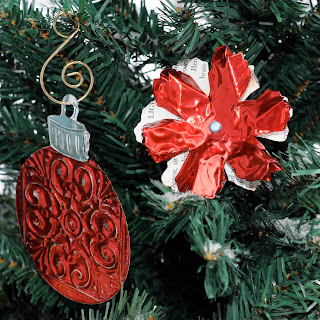
Here is yet another ornament that you can easily make at home. This one uses metal paper from Ten Seconds Studio in barn red and gold. I also used a die cut (Tim Holtz tattered flowers) but you could use any shape or just cut your own. I started by cutting the basic ornament shape, which is the large circle with a rectangle top - for the cap. I cut out some birds as well - just out of curiosity.
The metal paper cuts easily and beautifully. It is sharp, so be careful!
Here are the die cuts. I also cut some from scrap paper from an altered book.
Then, I embossed patterns onto each ornament.
These two plastic templates are from Ten Seconds Studio, but anything that has a pattern - a blanket, a cutting board, a tray, asphalt, fabric --- anything would work!
Here are the embossed images. I pinned the flower layers together with brads to make a 3D image. I also, sanded the raised images.
Here are the finished ornaments.
They look very striking on a tree or wreath.
Here is an ornament with a flower attached.
Even the flowers look great on the tree.
Here are some more.
The ornaments can be embossed with a stylus or empty ball point pen and a pad of paper. In order to emboss, place the pad of paper underneath the metal paper and draw on the metal paper. Go over the ridges again for a deeper ridge.
The flower petals were easily bent to give a 3D effect.
- Daniela


2 comments:
The ornaments are beautiful. You do such a great
Hello, nice post.
Post a Comment