

Showing posts with label Project. Show all posts
Showing posts with label Project. Show all posts
11/8/11
Demo Table Fun


10/10/11
Perfect Pearls, Metallic Mixative and Black Glossy Paper


Adirondack Alcohol Ink Mixative color of your choice - silver, gold or copper
Handle with felt
Blending Solution
Perfect Pearls color of your choice - copper, pewter or gold
Mini Misters
Black Glossy Paper
Versa Mark Embossing Ink Pad
1. Cut card to make an A-2 size card 4 1/4" x 5 1/2".
2. Cut black glossy paper to 4" x 5 1/4".
3. Attach felt to handle.
4. Drip some mixative onto your felt then add a small amount of blending solution (where it looks like a clear liquid on the felt is the blending solution) then pounce on your glossy paper. Do not rub or swirl as that takes the black off. Just go up and down all over the glossy paper in different directions. You can also drip blending solution directly onto glossy paper and not pounce, it will move the metallics and you will get a neat halo effect wherever the solution lands.


5. Ink up the stamp of your choice with a clear embossing ink, I used Versa Mark.

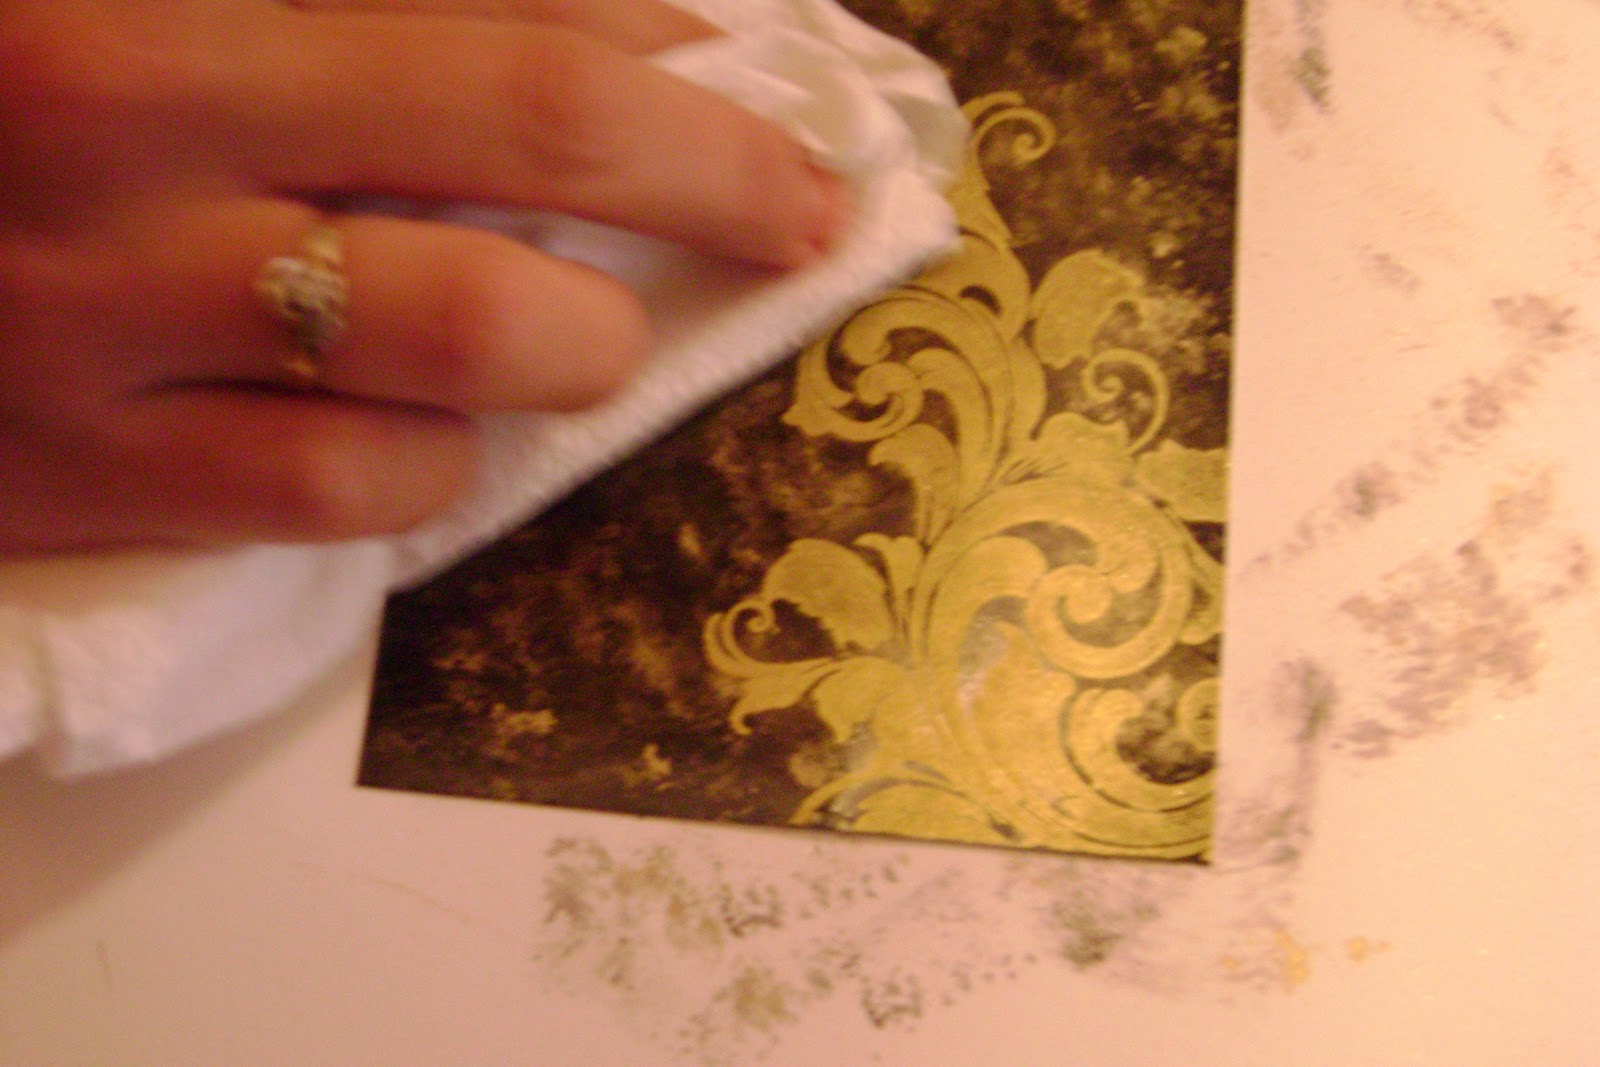
6. Stamp the image and then brush with Perfect Pearls. A little bit of Perfect Pearls goes a long ways so just pick up a small amount on the end of your brush. Since you are only using one color of Perfect Pearls put it on in a circular motions pressing it into the inked area. You don't have to do it hard but give is a little pressure. Your stamped image will appear like magic. Then lightly dust it off and using a paper towel going in a circular motion again buff it.
7. Mix a small amount of Perfect Pearl with water in a mini mister. Do not fill to the top with water leave room so that you can shake the mixture.

8. Holding the card in one hand the mister in the other point mister above card and let the mist gently fall onto the card. Let dry.

9. Put card together.

9/17/11
Sandy and Luminarte Part 2
Sandy's second post on the Creative Imaginations website is up! In this one she has a great craft idea using Twinkling H2Os and Pearl Pens. Go read the article for the directions! I can imagine making some really unique and easy wall decor with this technique.


8/15/11
Fun Book Marks

6x6 inch paper
3x3 inch patterned paper
Ink pad
stamps
watercolor paper
Twinkling H20
Detail scissors
Glue stick
GlueArt Perma Glue Squares
Water brushes
Pearl Pen
If you want to Zentangle use whatever Zentangle supplies you have....pens, black paper, white or cream paper
Making Pocket

1. Cut 6x6 paper diagonally so you have two triangles.
2. Find the center of the triangle and fold the two longest corners to the center...meeting but not overlapping.
3. Fold those corners downward to the center to create a square...do not glue down you are making a pocket.
4. Cut a 3 x3 square and glue inside the pocket

Making Butterfly
 1. Spritz your water color paper with water.
2. Make a background with the Twinkling H2Os.
3. Let your back ground dry completely or dry with an embossing gun.
4. Stamp your image and let dry.
5. Cut out image...cut black string for antenna's and adhere with a glue square.
 9. Adhere butterfly to pocket.
Zentangle
1. Draw pattern on 3x3 white or cream paper
2. Draw smaller Zentangle to adhere to the front
3. I used a black Pearl Pen for the center of the flower,
You will become addicted to making these little book marks. The possibilities are endless. Stamp image and color with pencils, markers, paint, whatever you want.
You don't even have to stamp...just adhere paper flowers, buttons, die cut etc.
You can make them part of a card by slipping it on a corner and then people will have a little gift they can use later. Have fun. You can post pictures on our facebook page of your book marks if you would like too. We'd love to see them.
8/8/11
Wax Paper Batik

The delicate fractured lines that occur on batik-dyed fabric are replicated with this technique. It works on most papers (matte or glossy) and vellum.
Supplies
paper
scrap paper
dye-based inks (Distress inks work great)
wax paper
paper towel
felt pressing cloth
iron pattern
Instructions
1. Take the wax paper and crumple it repeatedly until the desired texture is achieved.
2. Lay the felt on a table or ironing board, and then place the scrap paper on the felt. Lay the crumpled wax paper on the scrap paper and place the paper for printing on top of the wax paper.
3. Iron with a hot iron.
4. After the paper cools, apply the ink to reveal the pattern and wipe off any excess ink.
8/4/11
Flowers - Not Just For Spring

Supplies:
Variety of colored card stock
Variety of printed paper
Ancient Page or Archival Ink Black ( Neither of them will smudge with the Memento marker)
Memento markers and colored pencils ( I like the Memento marker if I want more intense color)
Outlines Petal Series Stamps in various sizes
Whatever Outlines Leaves you have on hand
Pearl Pens
Stickles Glitter Glue
Detail Scissors
GlueArt individual permanent glue squares
Mounting tape
Since all the cards are different I am just going to give you general directions that can be used on any of the cards.
1. Stamp your choice of stamps on your choice of paper with black ink.
2. Color with markers or pencils
3. Cut out with detail scissors
4. Layer flowers with mounting tape.
5. Attach flowers to card with glue squares.
6. Attach leaves with glue squares under the flowers.
7. After your card is together embellish with Pearl pens or glitter glue.
If you have any questions about this project just email Wingdoodle and we will try to help you. We also have samples in the store.
7/11/11
Fiber Paste - Making a Skin

I was going through a book, Surface Treatment Workshop by Darlene Olivia McElroy & Sandra Duran Wilson and came across a chapter on Fiber Paste. Well, it just so happens I have some Fiber Paste from Golden that I had gotten years ago and never used. So better late then never. I read the chapter and decided it didn't look or sound too hard. It is really cool stuff that looks like paper when it dries. You can paint, stamp, mold, rust, cut, rip and stencil on it once it is dried. The only drawback is you have to wait for it to completely dry, which I find very hard to do. The directions below are for making what is called a skin. You can use it directly on a canvas, watercolor paper or panel but this project is for a skin.
Supplies:
Palette knife
Fiber paste ( I used Golden)
Parchment paper or Plastic Wrap
Acyclic paint ( I used Adirondack acrylic paint dabber Gold) I absolutely love the dabbers - they are so easy to use.) You can use whatever color you want.
Art Glitter (Gale Glitz Gold) optional
 Step 1: Using the palette knife, spread the fiber paste onto your surface of choice, whether plastic wrap or parchment paper for a skin. While the paste is still wet, add texture if desired. Let the fiber paste dry completely before painting because it will be mushy till dry.
 Step 2: You can lift it from the plastic wrap or parchment when dry, and you have a fibrous, flexible paper. If you are going to print onto it, a digital ground needs to be used to ensure a crisper image.
Step 3: Paint

Step 4: Add art glitter. (Optional)

Step 5: Allow paint to dry completely.
I stamped on the smooth side of the fiber paste after it dried with Archival Ink Jet Black. Then I cut out the shape I wanted and using a paint brush, I painted Diamond Glaze over it. A little trick I learned to help get rid of bubbles in the Diamond Glaze: give it a small spritz with alcohol, if all of them don't disappear give it another quick spritz. Set aside to dry completely. Do not touch while wet - it will leave finger prints.
6/22/11
Adding Zentangles with a Flourish

Supplies:
 Tim Holtz Distress Stains (whatever colors you would like to make the flourish) I used peeled paint, antique linen and dusty concord. Krystin used wild honey, broken china and dusty concord.
 Mister bottle mixed with water and perfect pearls.
Large stamp - I used the Hero Art Fabulous Flourish (large stamps with a lot of solid surface work best).
Micron pen 01
White cardstock
Black cardstock for card cut to A2 size

Step 1: Starting with your lightest color daub the stamp wherever you what it to be light. Then add your next color and then the next if you have more then two. (If your stains overlap it doesn't matter you can wipe off the daubers, it won't contaminate them.) Don't over daub to much though because you will get mud.

Step 2: Spritz the stamp lightly. ( I hold it above the stamp, spray straight out and let the mist fall onto the stamp.) You can also skip this step if you want a darker image.

Step 3: Stamp your image onto the white cardstock. At this point you can spritz again and get a lighter image if you want to. Let the card dry naturally or use a heat gun to speed up the drying process.
Step 4: After it is completely dry. Use your 01 Micron to follow the lines of the flourish and use the different colored areas as your strings. Step 5: Mount on black cardstock.
You have a quick, easy and elegant looking card. Have fun.
6/18/11
Layered Decayed Backgrounds
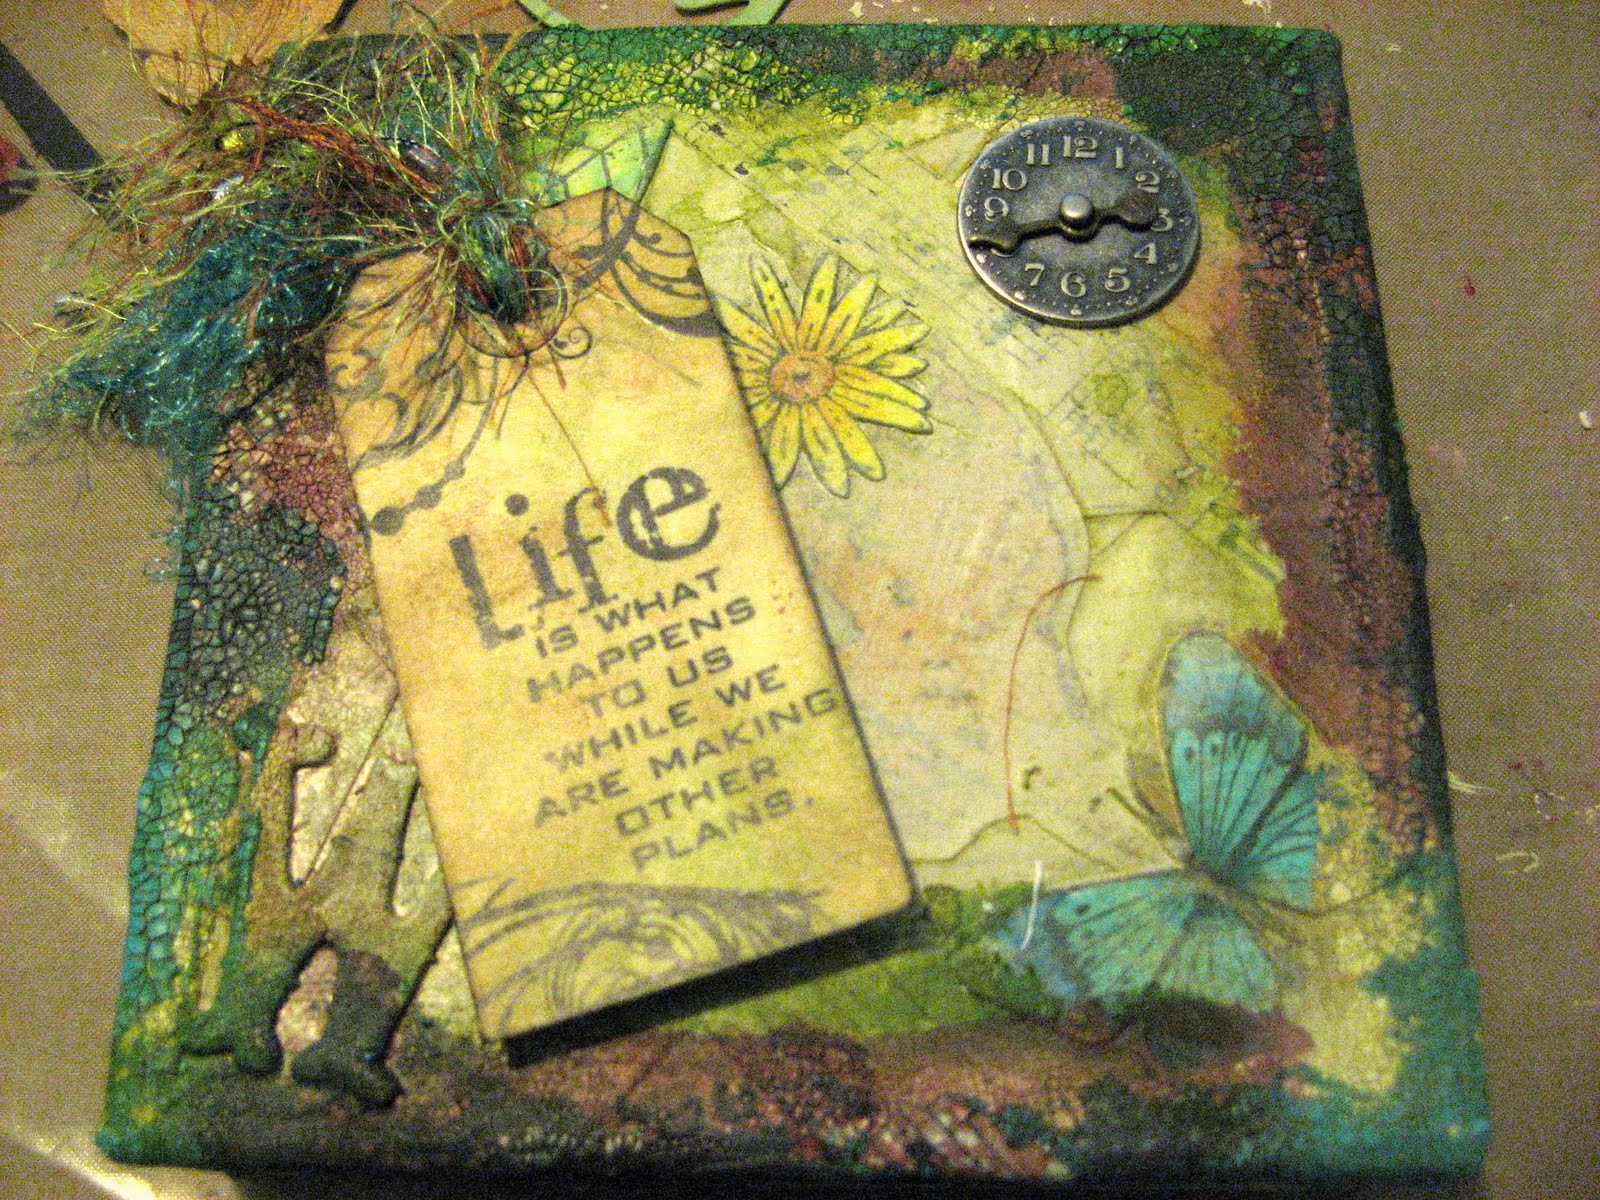
Why would you make a decayed looking background? I wondered the same thing. But then I thought it looked like a really cool way to use a lot of the Ranger products I have hanging around my craft room This technique comes from Jill Geraghty-Groves articles in Somerset Studios March/April 2011 issue called Layer After Layer and is very addictive. I want to keep doing canvas after canvas, each canvas looks totally different and was so much fun to create and watch develop. I love doing backgrounds, it's what to do with them after the background is done that I find the most difficult. I use butterflies a lot in everything I do. I like the delicate look, the colors and the way they soften what could otherwise be a rather harsh looking piece.. So here are the steps to creating your own decayed background ( I used a lot of the directions from the article).
Tools & Materials
- Acrylic paint
- Adhesives - Diamond Glaze or Glossy Accents, glue stick, and Tacky Glue. (Whatever is appropriate for the materials you are using.)
- Alcohol inks
- Crackle paint (Ranger)
- Embellishments
- Die Cuts
- Photograph & other ephemera
- Fibers
- Scissors
- Spray bottle filled with water
- Gesso
- Glossy or Matte Medium
- Sponge applicators

1. Prime canvas with a layer of gesso; this gives more grip for future layers, and will enhance your choice of mediums for subsequent layer. Let dry completely.

2. Tear a selection of vintage papers, manuscripts, letters, old dictionaries or whatever you want to make a collage. I keep on hand stamped, colored and cut out images to use in projects and I have an old dictionary that I can rip up.. Attach them to your canvas with matte or glossy medium applied with a sponge applicator.. Allow to dry completely.

3. Using Golden's Titan Buff mixed with gel medium, paint over the entire surface of the canvas If there is an area in particular that you want to highlight, use a baby wipe to gently remove some of the paint. Allow to dry completely.

4. Using a selection of Ranger Distress Crackle Paints ( I used Picket Fence, Antique Linen and Broken China), roughly apply a few layers of paint to the edges. I started with the lightest and let each layer dry before applying another layer. You can use a heat gun to speed up the drying process. ( The paint crackles better if you allow it to air dry for a while and when it starts to crackle finish drying it with a heat gun.)

5. Have s spray bottle filled with water ready. Working very quickly, apply a few drops of selected alcohol ink colors ( I used Lemonade, Lettuce and Hazelnut) to the corners of your canvas. Before they get a chance to dry, quickly spray over the colors with water. You'll see that the alcohol inks start to drip beautifully down your canvas and seep into the cracks of the crackle paint, bringing out even the tiniest crackle. Keep adding ink and water until you are happy with the result. Allow your piece to dry completely before decorating.
6. While I was waiting for my piece to dry I distressed a small tag with peeled paint and tea dye Distress Inks. I stamped a flourish from Impression Obsession and finished with a saying from Tim Holz Stuff to Say cling stamp set. I cut a piece of foam core to fit the back of my tag and attached it with Glossy Accents ( this is to give the tag support and also to make it dimensional ). I attached the fibers and then used the Glossy Accents to attach the tag to the canvas. I attached a clock from the Tim Holtz's idea-ology also with Glossy Accents.

Have fun working with a variety of colors and materials, you will be amazed at the different effects you can create.
2/27/11
Ribbon, Ribbon Everywhere!
This is what my ribbon stash looks like, one big mess and a lot of it. This is not a blog about organizing ribbon because organization is not one of my strong suits. This is about a technique to color your ribbon to match your project therefore ending your need to buy random ribbon just in case,

You will need:
Distress Reinkers (I used Broken China)t
Perfect Pearls (I used Cappuccino)
Water
Craft Sheet
White, ivory or cream colored ribbon or flowers

Because I used the Broken China and the Cappuccino my ribbon is blue with a hint of brown shimmer.
1 - Decide what colors you want to use.
2 - Take a small scoop of Perfect Pearl and put it into the Mini Mister.
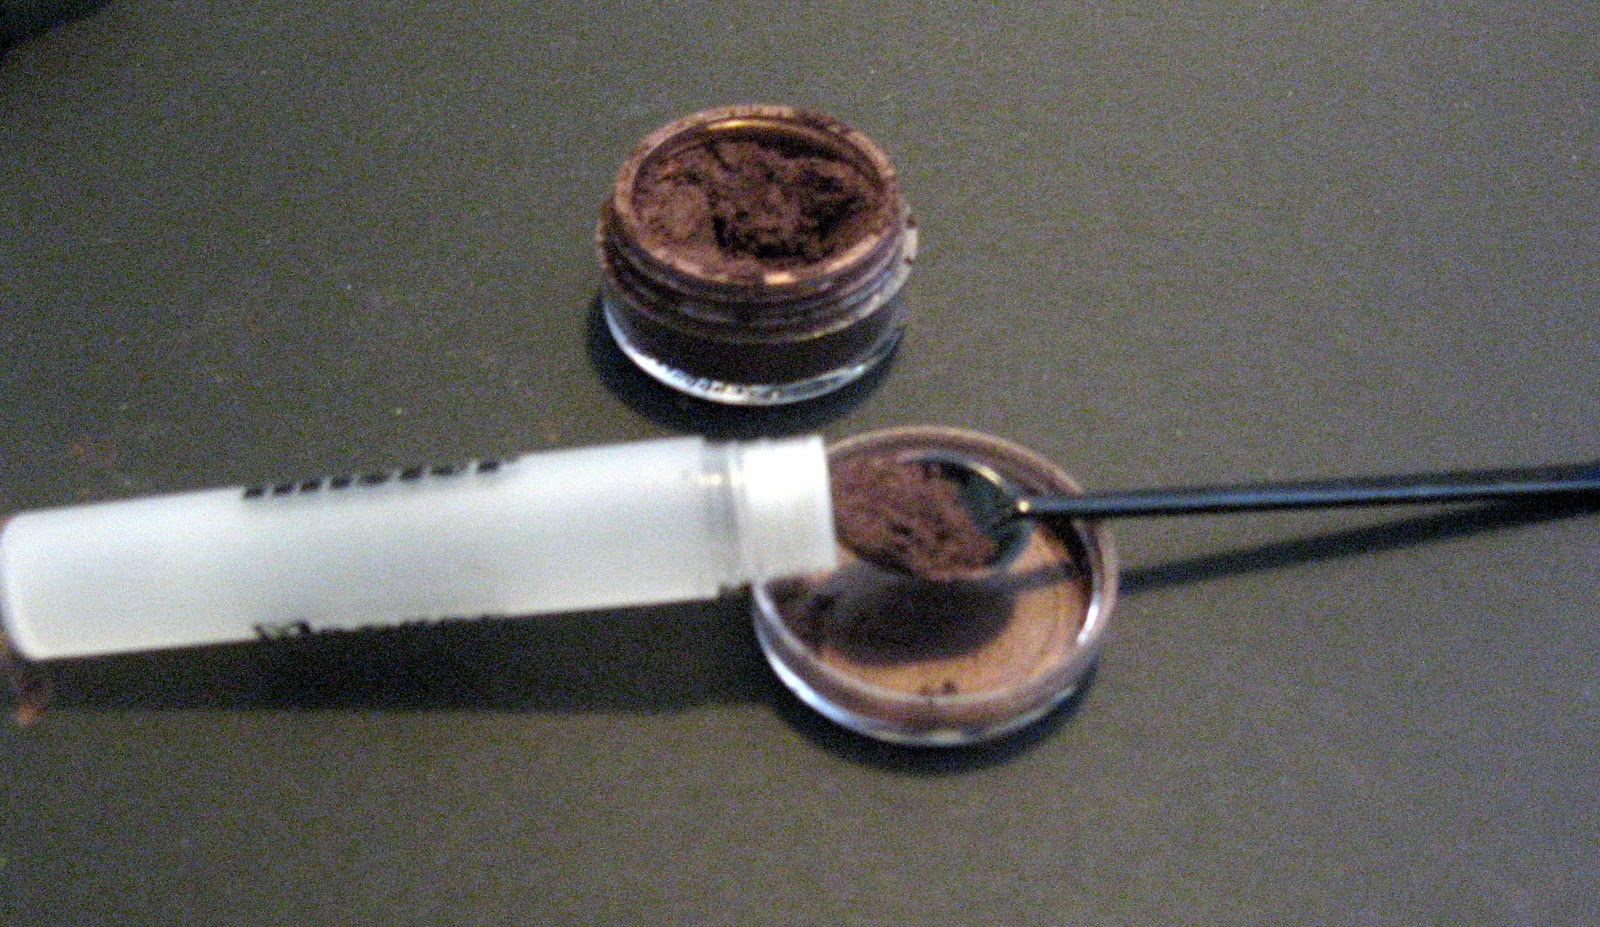
3 - Add a FULL dropper full of Distress Reinker.

4 - Add water but not to the top (you will have to have room to be able to shake the mixture) Shake.

5 - Make sure you have your craft sheet under whatever you are spraying. Spray your ribbon or whatever you are coloring.

6 - Let dry naturally. I don't recommend using a heat gun, you might start a fire or melt your ribbon.

7 - Use in project.

The color combinations are endless. Have fun.
SherRee
12/14/10
And Another Ornament Tutorial!

The metal paper cuts easily and beautifully. It is sharp, so be careful!


- Daniela
Subscribe to:
Posts (Atom)
LinkWithin
